
Quick Recap
We set up a new Directory Administration instance and an Amazon Managed Active Directory (Managed AD) instance in Part 1 of this blog series.
Tutorial Overview
In part 2,
- We will create a new service account in Managed AD for the AppStream 2.0 service machines and Image Builder.
- Next, in Managed AD, create a new Organizational Unit (OU) that the AppStream 2.0 machines can join.
- Subsequently, a golden image containing pre-installed applications will be generated for use with AppStream 2.0.
![]()
Vector Image by Sky Motion
Creating a Service Account
Start by connecting to the Directory Administration EC2 instance by either using Remote Desktop or using Systems Manager — Fleet Manager.
Step 1
Press the Start button and navigate to Active Directory Users and Computers.
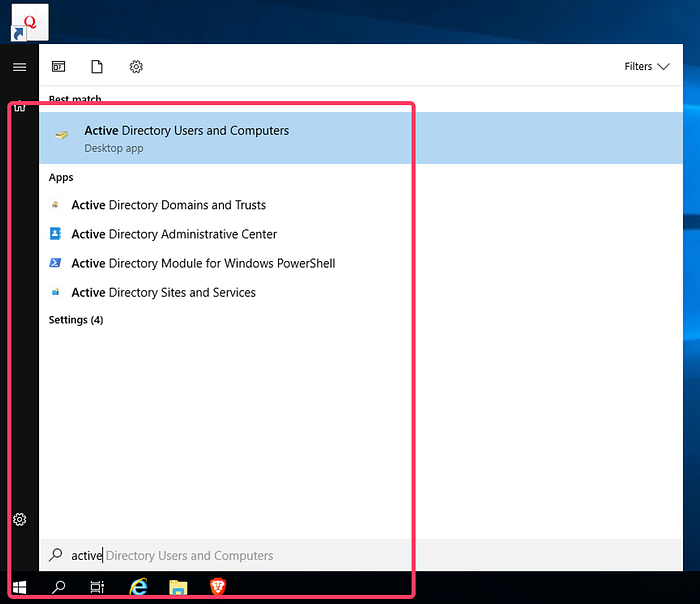
Search for Active Directory (AD) Users and Computers
Keep the Active Directory Users and Computers window open on the Domain Administration instance, as we will require it throughout the tutorial.
Step 2
Locate the Active Directory forest, then expand the tree until CORP and Users are found. Right-click on the Users OU, choose New, then User.
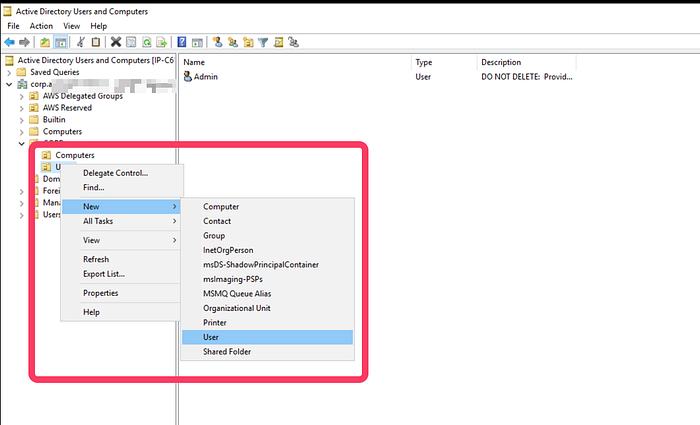
Find the New User workflow
Step 3
Fill in the fields as necessary. For our example, we will name the service account appstreamsvc. To proceed, click Next.

New Object — User wizard: Enter user details
Step 4
Set up a new password for this service account and ensure that the Password never expires option is selected. To proceed, click Next.
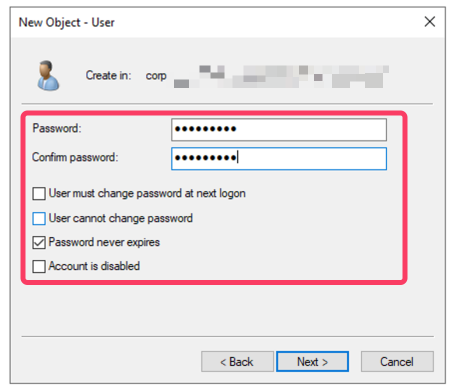
New Object — User wizard: setup password
Step 5
Review the options selected for the new service account.
To proceed with user creation, click Finish.
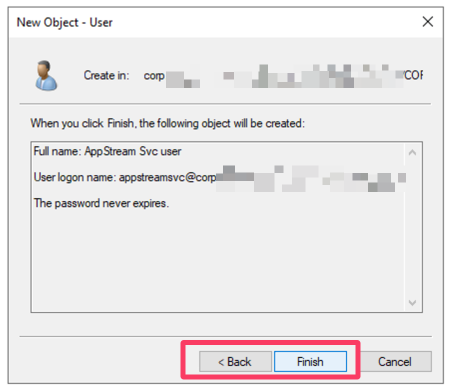
New Object — User wizard: Review and Confirm
You should see the new service account created and shown under the admin user.
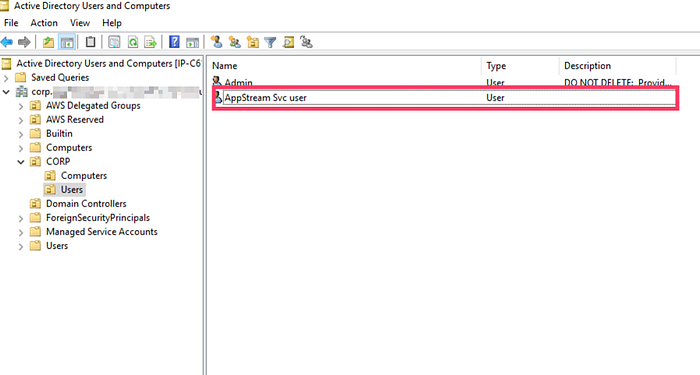
AD Users and Computers: see user in list
Using the same steps as above, create another service account for use with the image builder. In our example, we create the user with the name appstreambuilder.
Create an Organizational Unit
Using the same Active Directory Users and Computers window, proceed to create a new OU. The machines that the AppStream 2.0 service creates will use the OU.
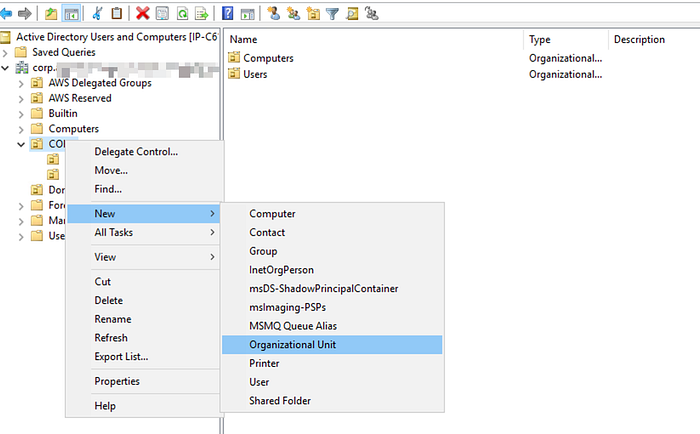
Find the New OU workflow
In our example, we will call the OU the Machinejoinou.

AD Users and Computers: Machinejoinou
Make sure to note down the distinguished name of the OU, as we will need it in a later part of this tutorial.
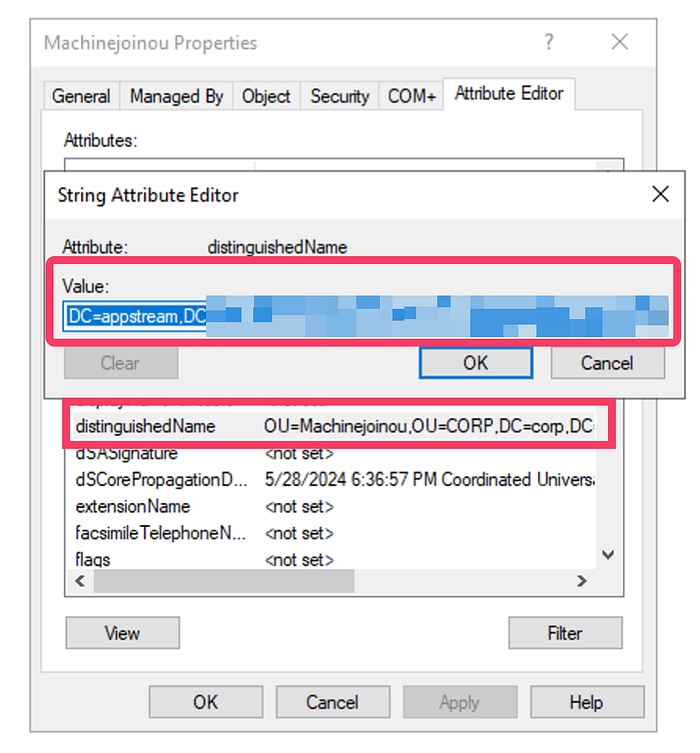
Copy Machinejoinou Distinguished Name
Delegate control to a service account
We are going to grant the new service account the authority to manage the addition and removal of new Active Directory objects (computer objects) within the Machinejoinou.
Step 1
Start by right-clicking on the Machinejoinou. Proceed to navigate to All Tasks, then select Delegate Control.
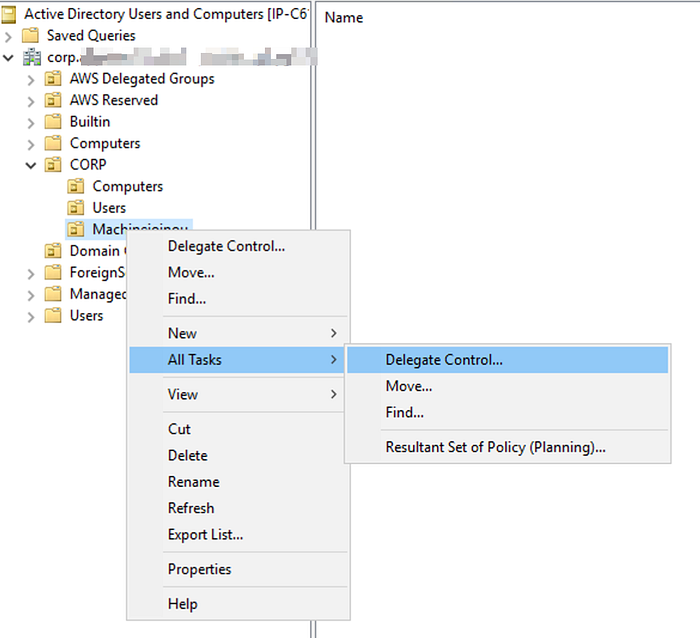
AD Users and Computers: Delegate Control workflow
Step 2
In the wizard window that appears, select Add after clicking Next.
Enter appstreamsvc, or the name of your service account, in the text field that says, Enter the object names to select.
Click on Check Names for the wizard to populate the object, as shown in the screenshot below, and verify the service account name.
Using the same method, add the second service account ( appstreambuilder) to the Users or Groups section.
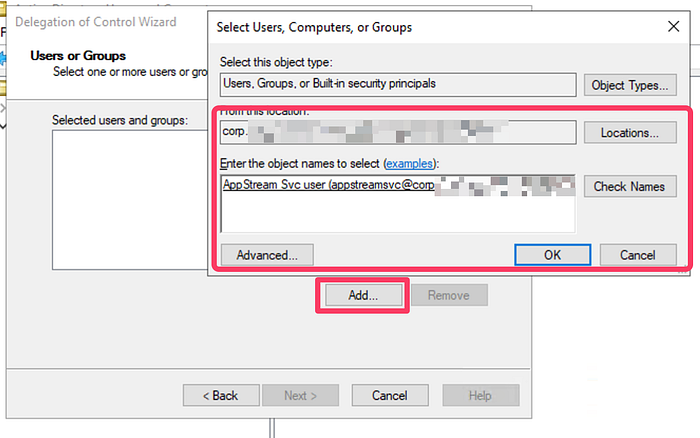
Delegation of Control wizard: Select Users, Computers and Groups
Step 3
Navigate to the next page ( Tasks to Delegate). Select the Create a custom task to delegate option, and click next.

Delegation of Control wizard: Tasks to Delegate
Step 4
Proceed to the next page, and
1. In the list, select Computer Objects. 2. Choose Create selected objects in this folder.
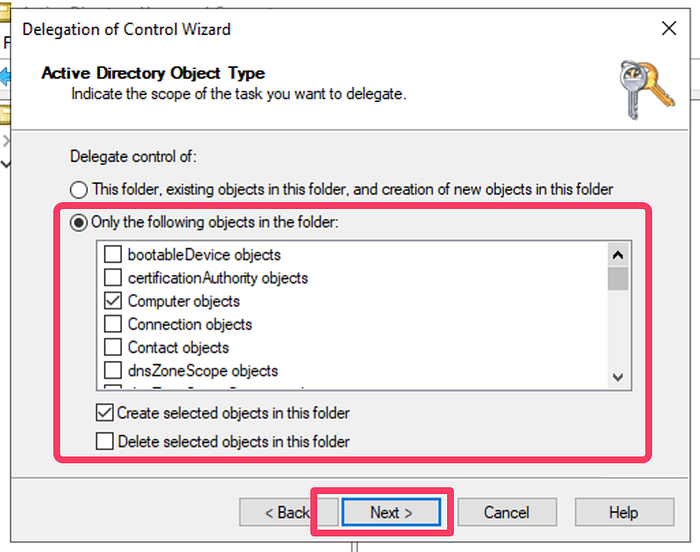
Delegation of Control wizard: AD Object type selection
Continue to the next step.
Step 5
Select general and property-specific options from the Show these permissions section.
In the Permissions list, make sure the following are selected:
- Read
- Write
- Change Password
- Reset Password
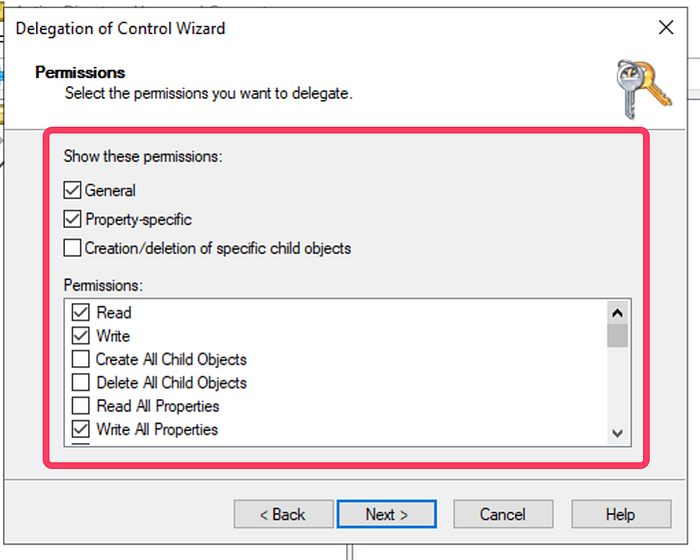
Delegation of Control wizard: select Permissions
On the next page, verify all the information and click Finish.
Create the Directory Config
The Directory Config is one of the main setups needed for AppStream 2.0 to function with Managed AD.
Open the AppStream 2.0 page in the AWS Console.
Select Directory Configs from the menu on the left, then click Create Directory Config.
Fill out this form with the following information:
- Directory Name: corp.example.com or replace with your directory name.
- Service Account Name: corp\appstreambuilder in our example.
- Type in the service account password twice (password/confirm password).
- Organizational Unit (OU): type in the value we copied earlier when we created Machinejoinou.
Create the Directory Config now.
The Active Directory Integration tutorial on the AppStream 2.0 documentation website does cover this, but we wanted to make sure to cover the nuances of using AWS Managed AD.
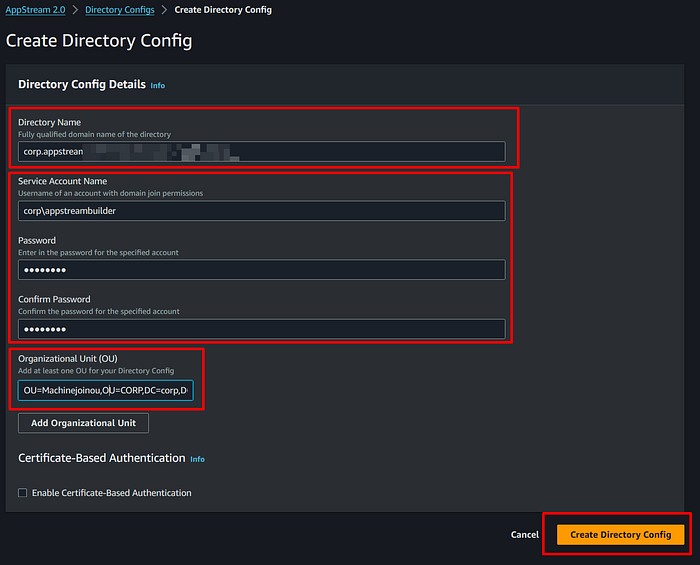
AppStream 2.0: Create Directory Config
Create an image using Image Builder
To start an instance of Image Builder,
- From the menu on the left, select Images.
- Click on the Image Builder tab.
- Click Launch Image Builder after that.

AppStream 2.0: Launch Image Builder
Step 1
Using the filter, locate the most recent Windows Server 2019 Base image. We will use AppStream-WinServer2019–05–08–2024 for our example.

AppStream 2.0: Choose an Image
Step 2
Enter the Name and Display Name in a relevant manner.
We use either stream.standard.small or stream.standard.medium for Instance Type.
Neither an IAM role nor a VPC Endpoint are necessary for the objectives of this tutorial.
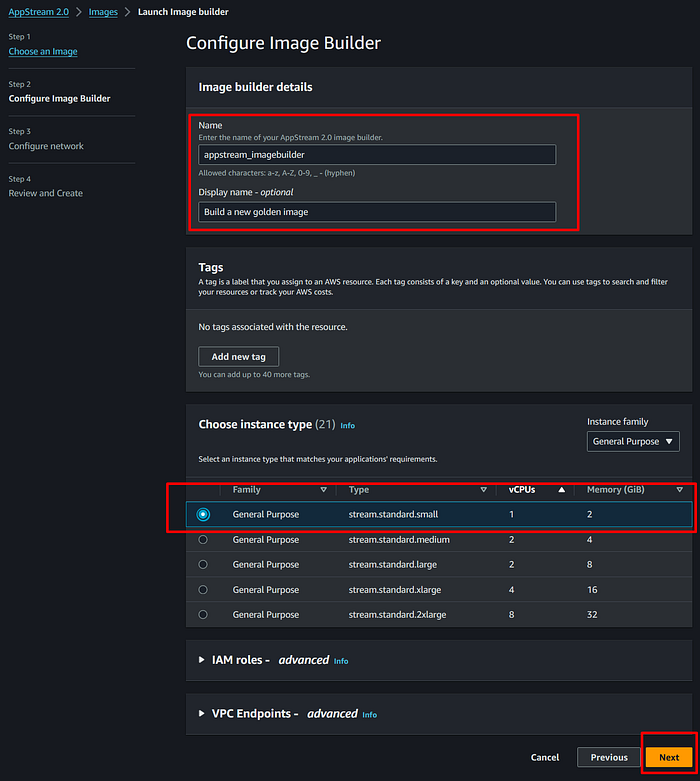
AppStream 2.0: Configure Image Builder
Step 3
Internet access is required for the Image Builder instance to download and install software. We will place this instance on a public subnet. Select security groups that have the required access control mechanisms in place.
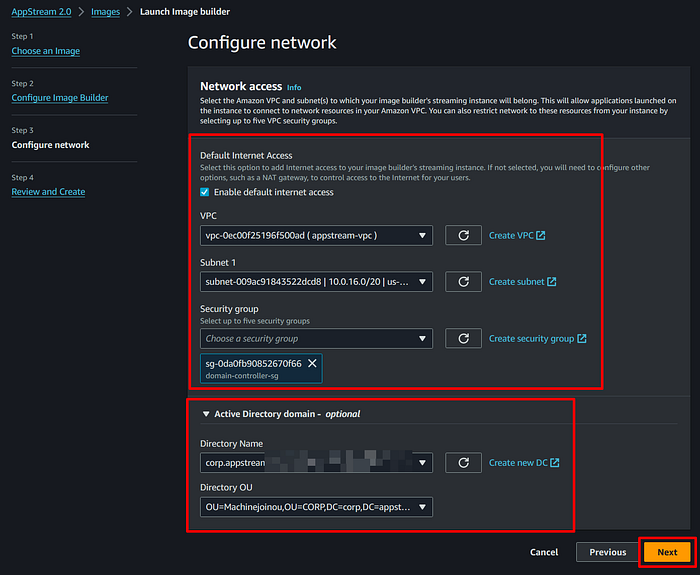
AppStream 2.0: Configure network for Image Builder
Step 4
Review the settings and launch the Image Builder instance.
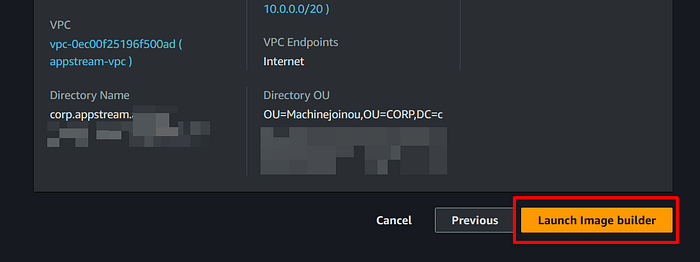
AppStream 2.0: Review and Launch Image Builder
The Image Builder will remain in Pending for a period of time and then switch to the Running state.
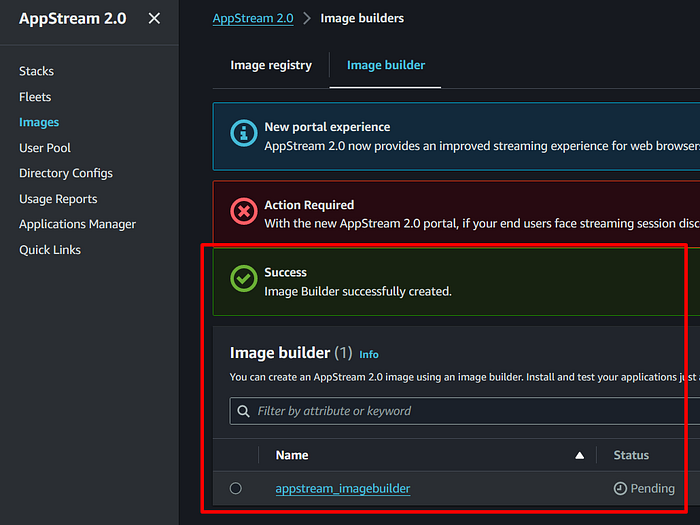
AppStream 2.0: Image Builder created
Establishing a connection with Image Builder.
Step 1
First, make sure you are connected to the Image Builder.
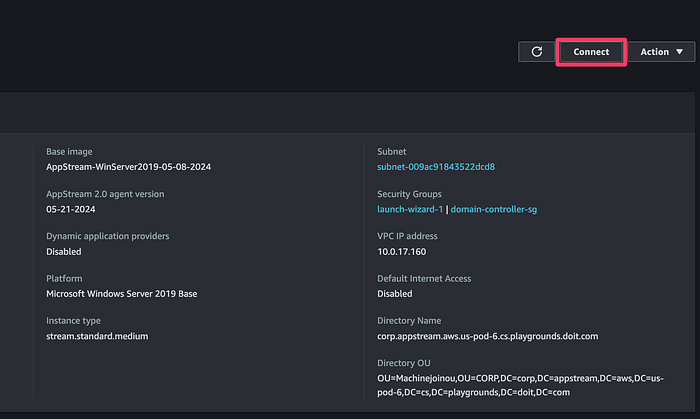
AppStream 2.0: Connect to Image Builder
Step 2
To log into the Image Builder, select the Administrator user under the Local User tab.
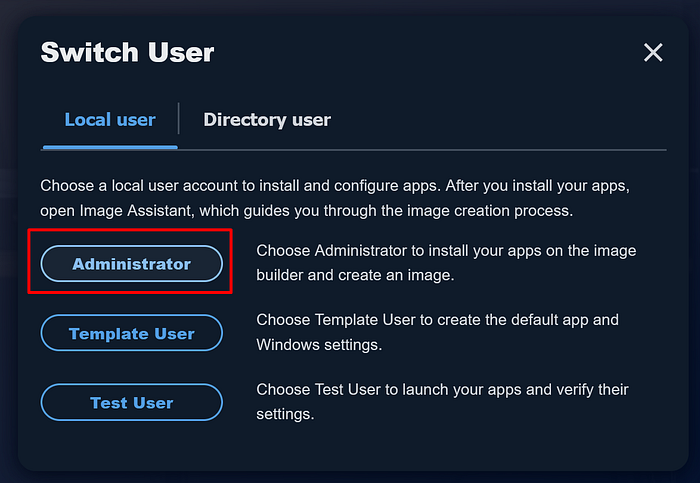
Image Builder: Login as Administrator user
The Windows server desktop will open in a new browser window.

Image Builder: Desktop view
Step 3
Testing the Managed AD service's connectivity is a helpful step, though it is not necessary.
Assign the service account user to the Image Builder instance and make them a local administrator.
To do this, click on the start menu and search for User. Click on Work or school users.
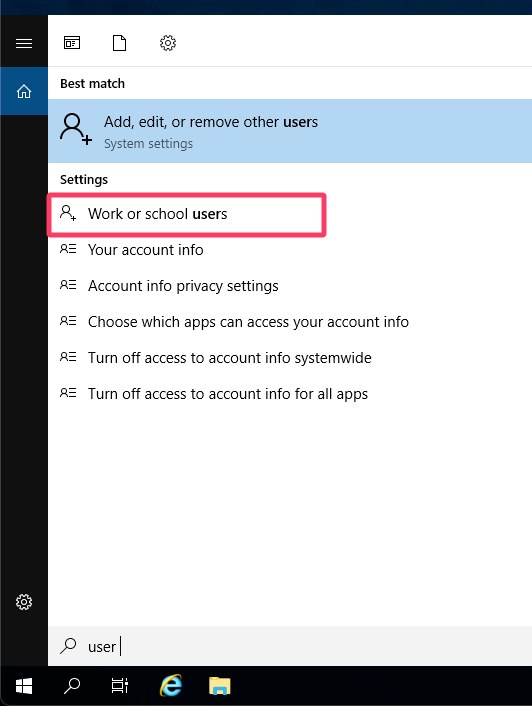
Image Builder: Find the Work or school users menu item
Proceed to add the appstreambuilder service account as a local administrator.
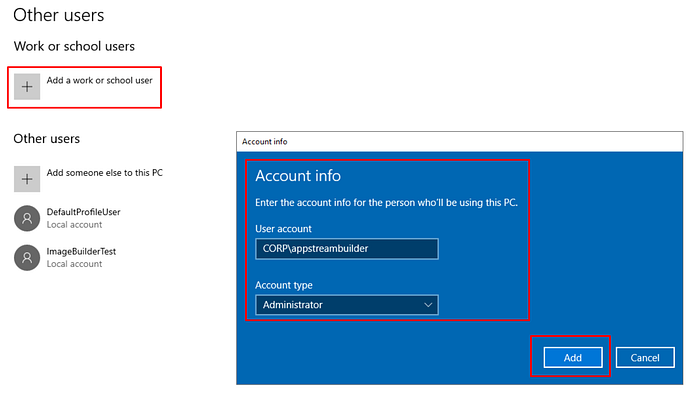
Image Builder: Add a work or school user
Step 4
We will use the service account credentials to log in and confirm that the image we are creating can connect to the Managed AD service.
You will notice a menu bar at the top of the Windows server desktop, with the menu option Admin Commands. Press this button, then choose to Switch User.
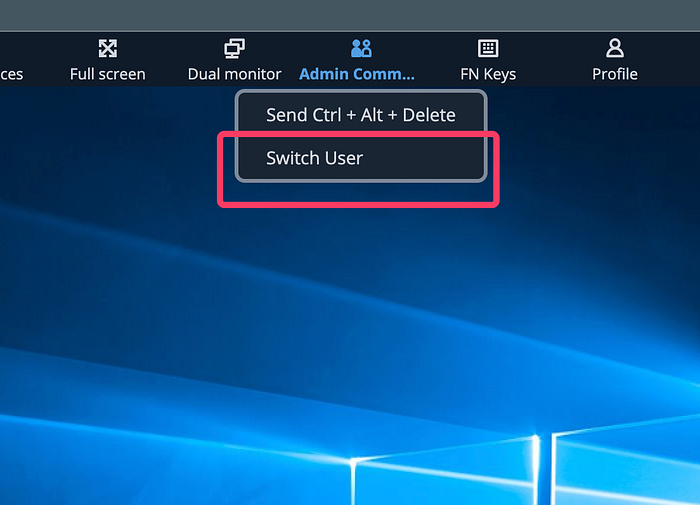
Image Builder: Switch user, Admin command
After choosing the Directory user tab, sign in using the appstreambuilder user name.
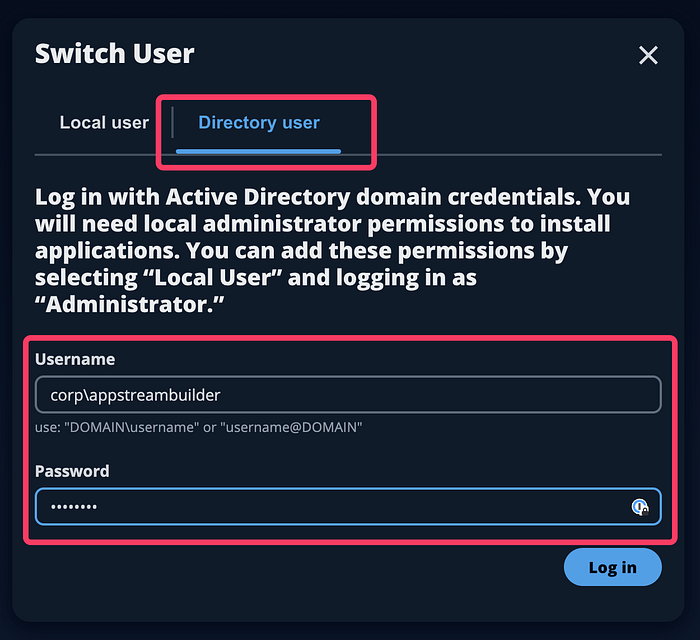
Image Builder: Login as Directory user
You are now logged in as the Active Directory user appstreambuilder, and the Windows server desktop will greet you.
Install any other software the same way you would on a Windows desktop computer.
As the administrator, please keep in mind that it is your duty to notify the end users of any additional licensing requirements or additional setup needed for the software you install.
For the purposes of this tutorial, we will install the open-source Gimp version 2.10.
Creating an Image
Step 1
From the desktop, choose and open the Image Assistant wizard.
Choose the apps you want end users to use with AppStream 2.0 by clicking on Add App. In this instance, Gimp-2.10 and Firefox will be used.
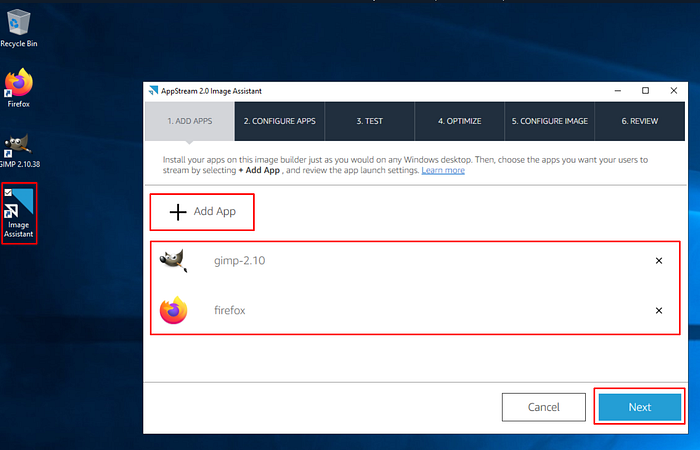
Image Builder: Add App
Step 2
On the Configure Apps page, click on Switch user.
The same user login dialogue box will greet you.

Image Builder: Configure Apps
We will select the Template user and then launch the applications normally to create the default app settings.
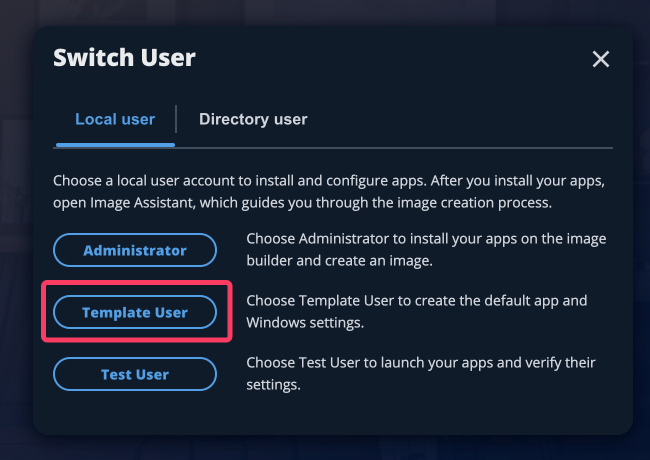
Image Builder: Switch to Tempalte user
Step 3
Using the Admin Commands menu, return to the appstreambuilder local Administrator user.
Image Builder: Switch User, Admin Command
Image Builder: Switch to Directory User
The Image Assistant wizard should now show the Template User in the drop-down.
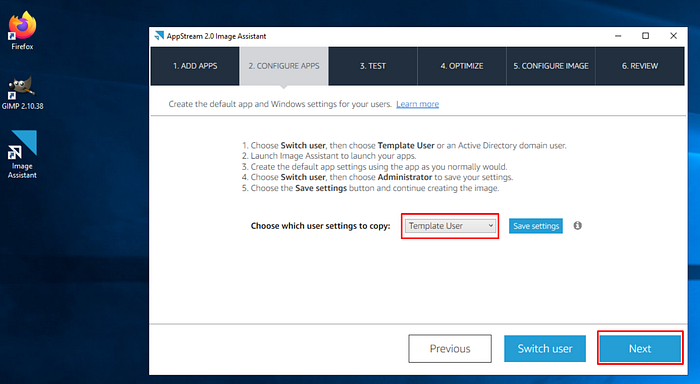
Image Builder: Select Template User to copy settings
Next, Test the application using the appstreamsvc user (Directory user) that we generated in the earlier portion of this guide.
To keep the tutorial brief, we will skip these steps as they are similar to those of the Template user section.
Step 4
Click the Launch button to start each application.
To proceed with the optimization process, click Continue after the application has finished booting up.
There will be a short period while the Image Assistant is inactive, optimizing your app’s launch experience.
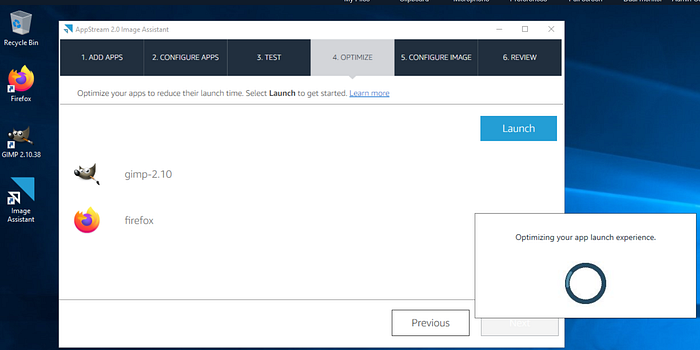
Image Builder: Optimize
Step 5
Set up the image's Name, Display Name, and additional metadata so that it appears in AppStream 2.0's Images list correctly.
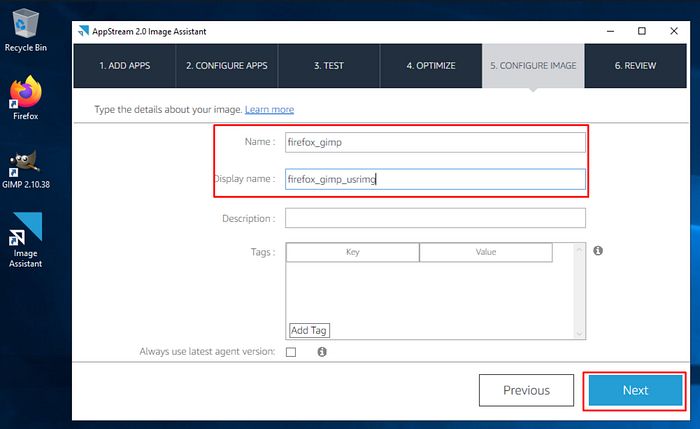
Image Builder: Configure Image
Step 6
After checking the configuration, click Disconnect and Create Image.
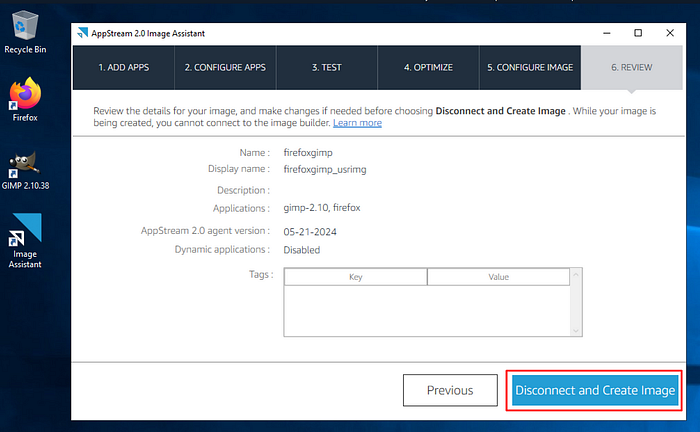
Image Builder: Create Image
Image Availability
The AppStream 2.0 service will take a snapshot of the Image Builder instance after all configuration and changes have been made in order to produce the final golden image.

AppStream 2.0: Snapshot in progress
The snapshot process will take time, and once it is ready, the new image will be shown under the Image Registry tab in the Images section of AppStream 2.0.
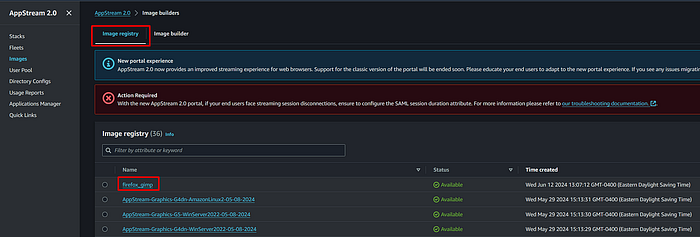
AppStream 2.0: Image available
References
- https://engineering.doit.com/amazon-appstream-2-0-b3bcdcc96611
- https://docs.aws.amazon.com/appstream2/latest/developerguide/active-directory-directory-setup.html#active-directory-setup-config
- https://docs.aws.amazon.com/appstream2/latest/developerguide/active-directory-admin.html#active-directory-permissions
DoiT International is a premier-tier AWS partner. Our areas of expertise include cloud cost optimization, architecture consulting, and assisting clients in getting the most out of cloud computing.
- We will have two Active Directory users that were set up specifically for AppStream 2.0.
- An image with pre-configured software for end users that has been tested and joined to a Managed AD domain.
See you for part 3 of the tutorial series. 👋