
This is a continuation of my previous blog post where I shared my opinion on Istio Ambient Mesh and compared it with the traditional sidecar-driven Data Plane model.
In this article, I will show you how to install and use Istio Ambient Mesh on a Google Kubernetes Engine cluster deployed on Google Cloud Platform.
Note: Istio Ambient Mesh is still in alpha and should not be used in production environments until it is upgraded to General Availability (GA).
Prerequisites
- Cluster should be running a supported version of Kubernetes (1.25, 1.26, 1.27, 1.28, 1.29).
- CNI (Container Network Interface) should be enabled on the cluster. GKE clusters have GKE CNI enabled by default. Dataplane v2 is currently not supported.
- At least 3 nodes and 4vCPU per node. Each z-tunnel reserves 500mCPU and 2Gi of memory and this doesn’t include the other components so it’s best to have sufficient vCPU and memory available.
- Platform prerequisites
- GKE specific prerequisites
Note: This installation won’t work on GKE Autopilot clusters since Dataplane v2 is not optional, although you can enable NET_ADMIN and NET_RAW capabilities .
Important: Compatibility Issues with DataPlane v2
Istio Ambient Mesh requires the installation of the Istio CNI plugin which replaces the functionality of the istio-init container (which requires NET_ADMIN andNET_RAW capabilities) without requiring the users performing the deployment to have elevated RBAC permissions to provision such privileged containers.
The Istio CNI documentation has the following disclaimer.
Note: The Istio CNI plugin operates as a chained CNI plugin, and it is designed to be used with another CNI plugin, such as PTP or Calico. See compatibility with other CNI plugins for details.
This is where things get a little messy. The legacy GKE Data Plane (currently the default) uses GKE CNI (Calico CNI if Network Policy is enabled) relying on kube-proxies and iptables for routing traffic within the cluster.
However, the relatively new GKE Data Plane v2 (which is going to be the default and defacto standard in the future) is essentially a managed version of Cilium CNI which uses an eBPF Data Plane that replaces kube-proxies with modern eBPF programs for enhanced networking.
This article by Solo.io explains how to configure Cilium CNI so it doesn’t break Istio. However, this only applies to the sidecar model of Istio and won’t work with Dataplane V2 anyway because it is a GCP-managed component whose configuration is immutable.
DataPlane V2 does use a veth device but maybe the eBPF programs just aren’t compatible with each other. If you know the reason why, I’d love to hear it in the comments.

So, we need to disable Dataplane v2 in our implementation so that the Istio CNI component can be installed successfully.
I hope that Dataplane v2 will eventually be supported since that will be the default Data Plane mode for GKE clusters in the near future.
Setting up the Cluster
In this example, I’m creating a basic GKE cluster with private nodes and a public master endpoint.
Here is the command I’m using to deploy the cluster in the default VPC network. You can adjust the variables as you like but ensure that Dataplane v2 is disabled.
It makes sense to have larger nodes with many pods per node to make the most of this in a live environment.
export PROJECT_ID=`gcloud config get-value project` && \
export M_TYPE=e2-standard-4 && \
export ZONE=us-central1-a && \
export CLUSTER_NAME=ambient-mesh-cluster && \
gcloud services enable container.googleapis.com && \
gcloud container clusters create $CLUSTER_NAME \
--project $PROJECT_ID \
--cluster-version "latest" \
--release-channel "regular" \
--location $ZONE \
--machine-type $M_TYPE \
--image-type "COS_CONTAINERD" \
--num-nodes "3" \
--enable-private-nodes \
--master-ipv4-cidr "172.16.0.0/28" \
--enable-ip-alias \
--no-enable-master-authorized-networks \
--network "projects/$PROJECT_ID/global/networks/default" \
--subnetwork "projects/$PROJECT_ID/regions/us-central1/subnetworks/default"
When the cluster has been created, GCP automatically creates firewall rules on your behalf to allow the control plane master to communicate with the nodes.
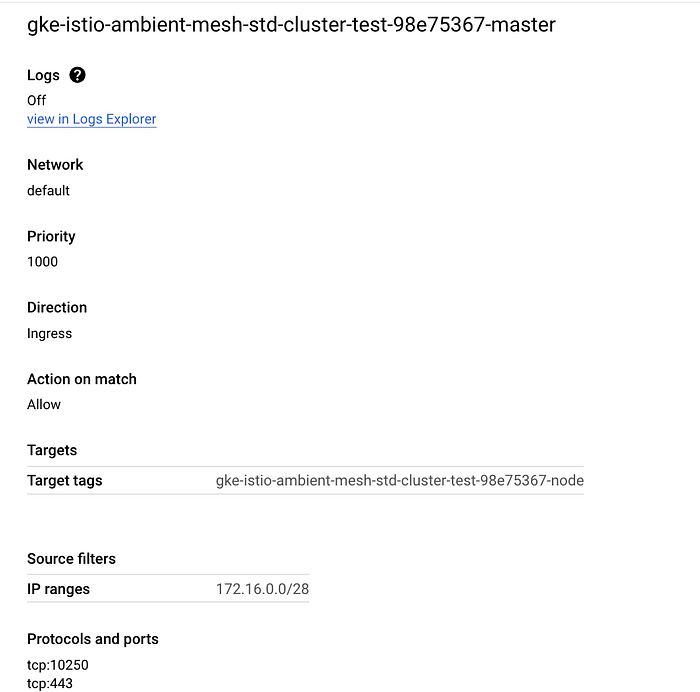
We can see that TCP ports 443 (HTTPS) and 10250 (Kubelet) are allowed, however, this rule does not open port 15017 which is needed by the Pilot (Istio Control Plane component) discovery validation webhook.
If you use a private GKE cluster (which I am in this case), we must create a firewall rule to allow traffic from the master over port 15017. First, get the source IP range of the master and network tags of the firewall rule:
gcloud compute firewall-rules list --filter="name~gke-${CLUSTER_NAME}-[0-9a-z]*-master" --format="table(targetTags, sourceRanges.list())"
Then, using the source IP range and network tags from the output of the previous command, create a new firewall rule to allow traffic from the master over TCP port 15017:
gcloud compute firewall-rules create <firewall-rule-name> --network <VPC-name> --source-ranges=<CIDR_RANGE> --direction=INGRESS --target-tags=<TAG> --allow tcp:15017
Also, ensure that you have Cloud NAT configured in the VPC where the cluster is deployed to ensure that the pods in the private GKE nodes have access to the internet.
Downloading and Installing Istio in Ambient Mode
Download the latest version of Istio:
curl -L https://istio.io/downloadIstio | sh -
Change to the Istio directory and add the Istioctl client to your path:
cd istio-1.20.3/
export PATH=$PWD/bin:$PATH
Authenticate and connect to your GKE cluster (Ensure you have sufficient IAM permissions to connect to and make deployments on the cluster)
gcloud container clusters get-credentials ${CLUSTER_NAME} --zone ${ZONE} --project ${PROJECT_ID}
Install Kubernetes Gateway CRDs:
$ kubectl get crd gateways.gateway.networking.k8s.io &> /dev/null || \
  { kubectl kustomize "github.com/kubernetes-sigs/gateway-api/config/crd/experimental?ref=v1.0.0" | kubectl apply -f -; }
Install Istio in ambient mode
istioctl install --set profile=ambient --set "components.ingressGateways[0].enabled=true" --set "components.ingressGateways[0].name=istio-ingressgateway" --skip-confirmation
You should see the following 5 components installed successfully, particularly the CNI and the z-tunnel.
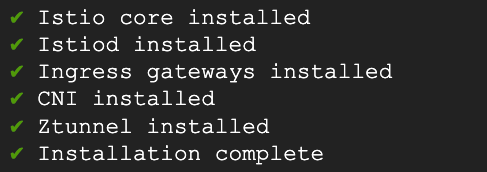
Verify that the components are installed and ready by checking the pods and DaemonSets in the istio-system namespace.

kubectl get pod -n istio-system

kubectl get ds -n istio-system

kubectl get ds -n kube-system
Deploying applications to Istio Ambient Mesh
One of the cool things about Istio is that you don’t need to make any changes to your applications. Here we’ll deploy the classic sample Istio bookinfo application as it is and then add them to the mesh post-deployment.
You will find the code for the bookinfo application in the same directory where you installed Istio.
kubectl apply -f samples/bookinfo/platform/kube/bookinfo.yaml
Deploy 2 more applications (curl clients) that we will use to simulate traffic to the mesh environment.
kubectl apply -f samples/sleep/sleep.yaml
kubectl apply -f samples/sleep/notsleep.yaml
Deploy an ingress gateway to access the Bookinfo app from the internet.
kubectl apply -export GATEWAY_HOST=$(kubectl get service/istio-ingressgateway -o jsonpath='{.status.loadBalancer.ingress[0].ip}' -n istio-system)l
Get the internal and external endpoints of the istio-ingressgateway service. We’ll send traffic to both these endpoints to view traffic within the mesh as well as external traffic from outside the cluster.
export GATEWAY_HOST_EXT=$(kubectl get service/istio-ingressgateway -o jsonpath='{.status.loadBalancer.ingress[0].ip}' -n istio-system)
export GATEWAY_HOST_INT=istio-ingressgateway.istio-system
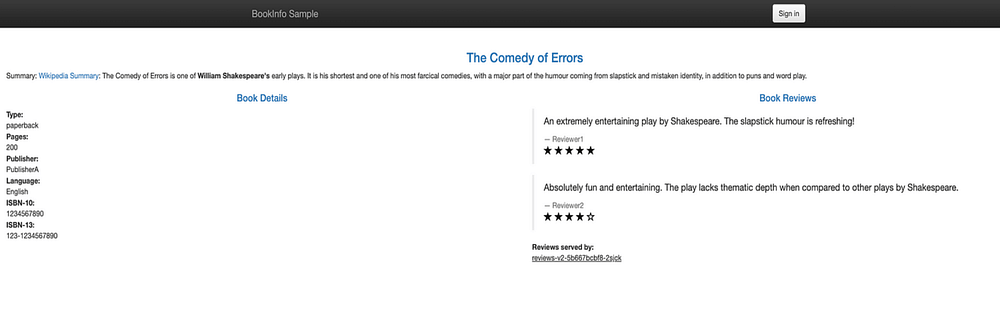
when viewed from a browser
Viewing the Mesh in Action
Deploy a sample installation of Prometheus and Kiali to monitor and visualize traffic respectively.
kubectl apply -f https://raw.githubusercontent.com/istio/istio/release-1.20/samples/addons/prometheus.yaml
kubectl apply -f https://raw.githubusercontent.com/istio/istio/release-1.20/samples/addons/kiali.yaml
Modify the Kiali service file to expose it to the internet so you can view it from your browser.
kubectl patch svc kiali -n istio-system -p '{"spec": {"type": "LoadBalancer"}}'
View it in the browser once an external IP has been provisioned for the Kiali service. We currently have limited data given that our applications are not part of the mesh yet.
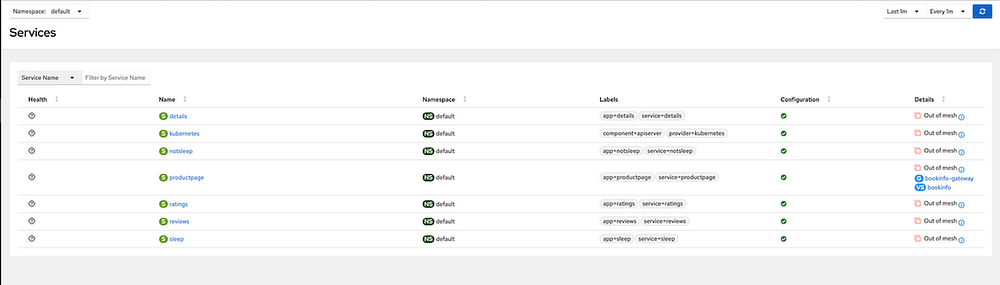
Add the Bookinfo applications in the default namespace to the Ambient Mesh by labelling the namespace.
kubectl label namespace default istio.io/dataplane-mode=ambient
The applications are now seamlessly part of the mesh without any disruptions. Let’s send some traffic to these applications from our curl clients and see the mesh in action.
curl http://$GATEWAY_HOST_EXT/productpage
#Traffic from user to external gateway endpoint
kubectl exec deploy/sleep -- curl -s "http://$GATEWAY_HOST_INT/productpage"
#Traffic from pod to internal gateway endpoint
kubectl exec deploy/sleep -- curl -s http://productpage:9080/
#Traffic from pod to svc (directly)
kubectl exec deploy/notsleep -- curl -s http://productpage:9080/
#Traffic from pod to svc (directly)
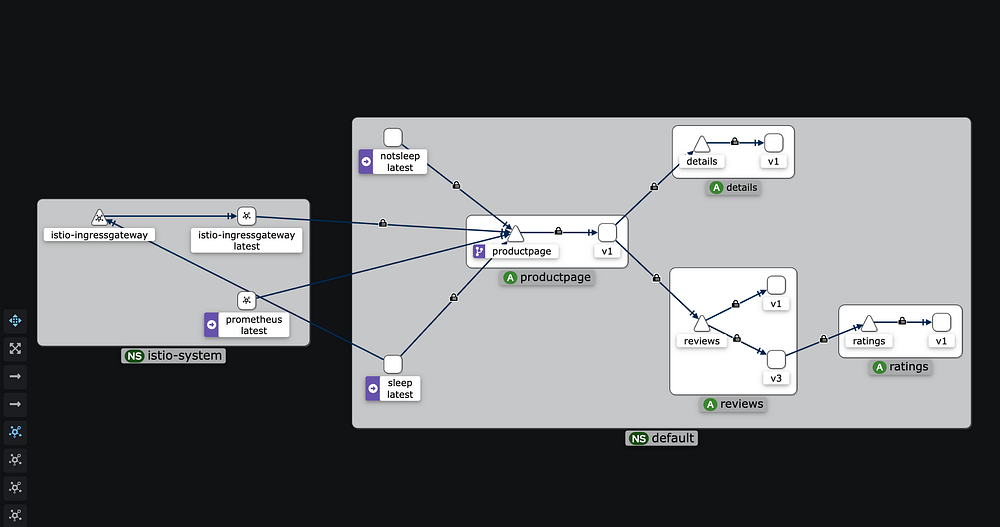
Check the Kiali graph again. It should now be populated with data showing communications secured with mTLS along with other useful telemetry data.
Applying L7 Authorization Policies
Now that the secure overlay is in place, you can easily apply L4 authorization policies just like you would do with default Istio.
However, this secure overlay does not allow us to utilize L7 filtering. For that, we need to deploy an Envoy-based waypoint proxy for the productpage service.
The proxy is applied to the service account so in the case of the productpageservice, the service account is bookinfo-productpage.
Deploy a waypoint proxy for the productpage service:
istioctl x waypoint apply --service-account bookinfo-productpage
This deploys a waypoint proxy for any service that uses the bookinfo-productpage service account.


Any traffic going to the productpage service will now have to go through the L7 proxy which scales automatically based on usage
Let’s create an L7 AuthorizationPolicy to explicitly allow the sleep and gateway service accounts to GET the productpage service, but perform no other operations.
export GATEWAY_SERVICE_ACCOUNT=ns/istio-system/sa/istio-ingressgateway-service-account
kubectl apply -f - <<EOF
apiVersion: security.istio.io/v1beta1
kind: AuthorizationPolicy
metadata:
  name: productpage-viewer
  namespace: default
spec:
  targetRef:
    kind: Gateway
    group: gateway.networking.k8s.io
    name: bookinfo-productpage
  action: ALLOW
  rules:
  - from:
    - source:
        principals:
        - cluster.local/ns/default/sa/sleep
        - cluster.local/$GATEWAY_SERVICE_ACCOUNT
    to:
    - operation:
        methods: ["GET"]
EOF
Test the policy in action:
# this should fail with an RBAC error because it is not a GET operation
kubectl exec deploy/sleep -- curl -s "http://$GATEWAY_HOST/productpage" -X DELETE
# Output should be 'RBAC: access denied'
# this should fail with an RBAC error because the identity is not allowed
kubectl exec deploy/notsleep -- curl -s http://productpage:9080/
# Output should be 'RBAC: access denied'
# this should continue to work
kubectl exec deploy/sleep -- curl -s http://productpage:9080/ | grep -o "<title>.*</title>"
# Output should be '<title>Simple Bookstore App</title>'
Cleanup
Execute the following commands to uninstall Istio and its components
istioctl x waypoint delete --all
istioctl uninstall -y --purge
kubectl delete namespace istio-system
Delete GKE Cluster
gcloud container clusters delete $CLUSTER_NAME --zone $ZONE
It’s pretty cool how the L4 and L7 functionalities have been modularized for flexibility and efficiency.
I’m particularly interested in observing the benefits at scale and would love to see the Ambient Mesh in a live production environment.
I hope you found this article useful and interesting. Feel free to share your thoughts and feedback in the comments.