
How the DoiT Cloud Intelligence CLI unlocks superior cloud management
We have just released the DoiT Cloud Intelligence CLI and you wouldn’t imagine the smile this announcement put on my face. Maybe I’m dating myself here but, I grew up in a world where bash scripting felt like a superpower and those who were eloquent in grep at the time were revered as we now revere the most acute data analyst. But I’m digressing.
Immediately, I jumped at the opportunity to take our newly released CLI for a spin and from the get-go, I learned something. We used restish as the bedrock for its implementation: as long as your API is based on OpenAPI (and DoiT’s is), it will handle schema discovery and authentication.
The Setup
To get started, I followed our documentation, installed restish via brew on my terminal and configured to work with the DoiT APIs. The default profile allows for call customizations which I didn’t use at the beginning but I’m showing here as some of you might find interesting.

It’s now time to verify everything is working correctly so I’ve validated my login using the specific command restish dci validate which triggered the OAuth workflow (shout-out to Browserosaurus, an amazing browser selector I cannot live without)
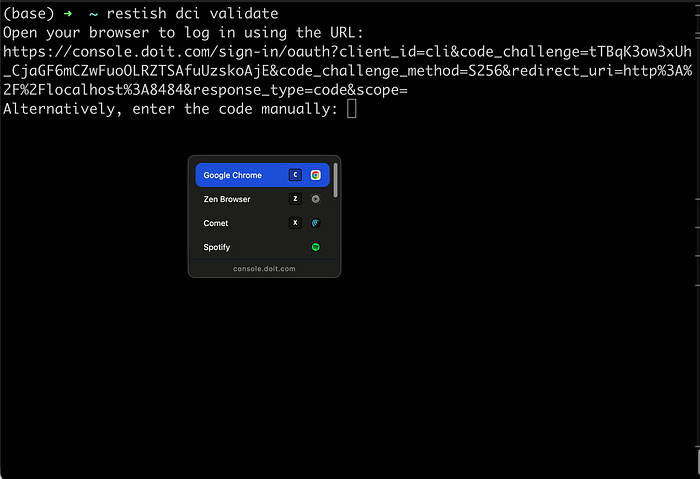
After logging in my DoiT Cloud Intelligence tenant, all looked good: I’m ready to script my way through superior cloud management.
The Goal
For my first use case I’ve blatantly copied what our customers have struggled with for years before partnering with DoiT: cost accountability.
I wanted to ensure a smooth, simple way for customers to:
- Invite a new user on DoiT Cloud Intelligence;
- Create an Allocation based on their username that would track the costs they generated;
- Create a budget tracking the newly created Allocation that will send notifications if a specific threshold is met.
This will allow any new user to have their own personal feedback loop on cloud costs, with minimal friction. So let’s get started.
The Implementation
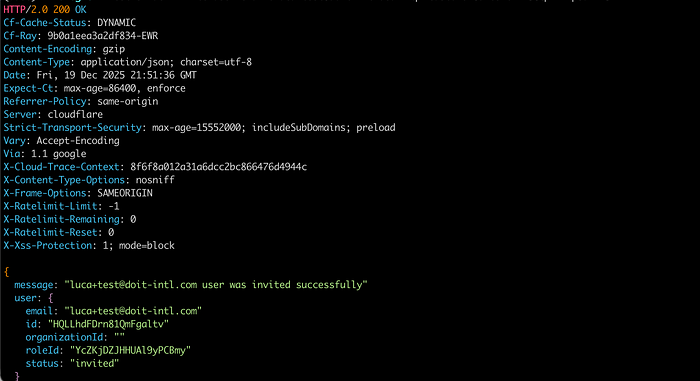
Inviting the user
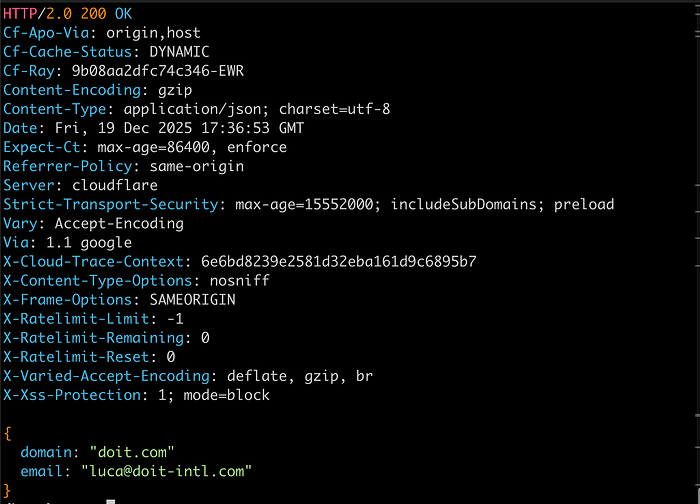
This is as simple as it gets, the command is:
restish dci invite-user email:<user_email>
you have e-mail
Creating a user-dedicated Allocation
If you’re new around here and you don’t know about Allocations, I highly recommend you get familiar with them.
The TL;DR is: Allocations allow users to logically group cloud costs based on any available data dimension. In our case, I’d like to logically group all the cloud costs generated by our newly created user, so they can easily monitor their spend.
The command is
restish dci create-allocation < allocation_conf.json
but we need to pass a few parameters as configuration. I’m going to slightly cheat and assume that there’s a Tag key available in our billing data called member and each value corresponds to a cloud engineer (in our case, luca+test )
The conf.json file is going to be as follows:
{
    "name": "luca+test generated costs",
    "description": "All costs generated by luca+test",
    "rule": {
        "formula": "A OR B",
        "components": [\
            {\
                "key": "member",\
                "type": "label",\
                "mode": "is",\
                "values": [\
                    "luca+test"\
                ]\
            }\
        ]
    }
}
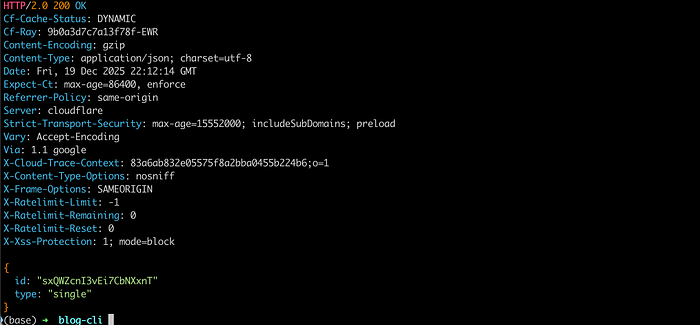
Running the command provides the Allocation id which will come in handy shortly.
Creating a user-dedicated Budget
The sound of the word “budget” instills fear into most of the engineers I talk to: it’s a synonym for slowing down innovation through restrictions and barriers.
While I acknowledge this might have happened in the past, the way Budgets are implemented in DoiT Cloud Intelligence creates a productive feedback loop between cloud engineers and their costs, where bad surprises are practically extinct and awareness is the key mantra.
If you want to learn more, please head over our Documentation where we dive deeper into all their functionality.
In my use case, I want to keep it simple. I just need a simple monthly budget of $1000 to make sure newly-created users know their spend and are proactively alerted if the spend we identified through the Allocation is hitting 80% of the budget.
Once more, it’s pretty straight-forward:
restish dci create-budget < budget_conf.json
and the budget_conf.json looks as follows:
{
    "name": "luca+test - Monthly Budget",
    "scope": ["<ALLOCATION_ID>"],
    "amount": 1000,
    "type": "recurring",
    "timeInterval": "month",
    "startPeriod": $(( $(date -u -v1d -v0H -v0M -v0S +%s) * 1000 )),
    "currency": "USD",
    "alerts": [{"percentage": 80}],
    "collaborators": [\
        {\
            "email": "<user_email>",\
            "role": "owner"\
        }\
    ]
}
A couple of things worth noting here:
- The
startPeriodvalue should be expressed in seconds since epoch. I’ve included in the configuration file the command on how to extract that. - You can have multiple alerts set at different percentage thresholds: in this case, we have limited ourselves at one.
Running the command results in a successful response
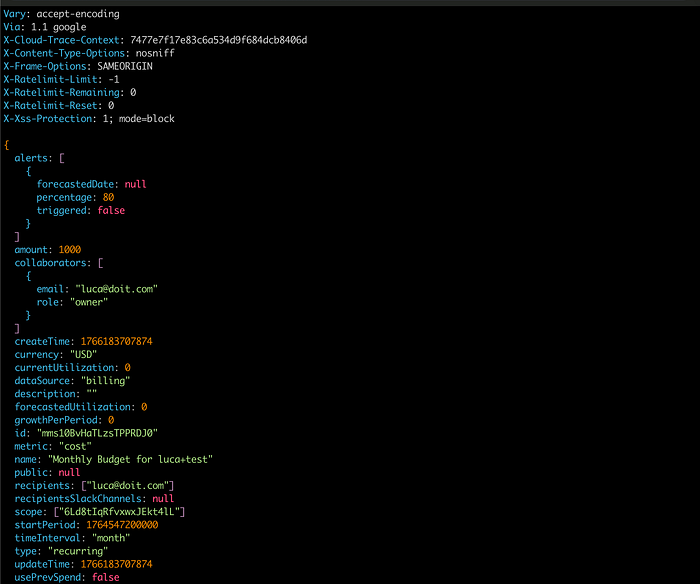
no more surprises!
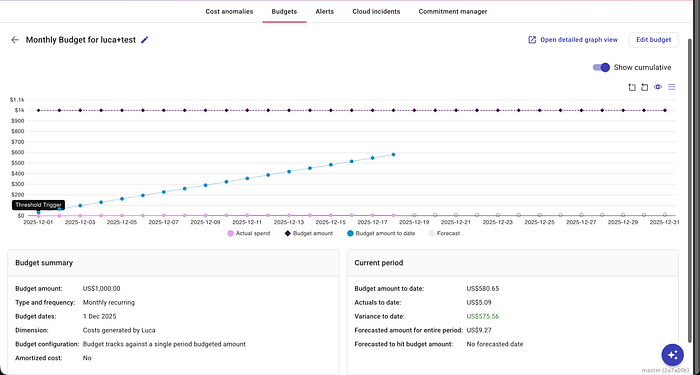
The WebUI shows the tracked data and relative thresholds
This concludes my initial exploration of the DoiT Cloud Intelligence CLI, but sky is the limit. Imagine combining these steps into an onboarding script!
Maybe that’s a great idea for another blog. In the meantime get the DoiT Cloud Intelligence CLI installed and do not hesitate to reach out to us for any support.