
Photo by Maruful Hari from Shutterstock
In the ever-evolving world of DevOps, efficient communication and quick access to information are key. As teams increasingly shift their operations and workflows to chat applications, the need for tools that streamline these activities is more apparent than ever.
Enter AWS Chatbot, a powerful tool designed to bring AWS right into your Slack channels.
AWS Chatbot is an interactive agent that integrates with your Slack channels and Amazon Chime chat rooms, enabling you to monitor and interact with your AWS resources directly from your chat platform.
The beauty of AWS Chatbot lies in its ability to reduce context switching between applications, thereby improving productivity and response times.
In this guide, I’ll walk you through the process of integrating AWS Chatbot with Slack. Our goal is to set up a system that notifies you whenever a new S3 bucket is created in your AWS account. This way, you can keep track of your resources and respond to changes more efficiently.
Summary of Steps to Take
- Set up Amazon Simple Notification Service (SNS) Topic
- Configure Slack Client
- Configure AWS Chatbot Client
- Configure Amazon EventBridge rule
- Test Notifications
**Setup SNS Topic**
To use AWS Chatbot, you must have Amazon SNS topics set up.
Open the Amazon SNS console and create a Topic name.
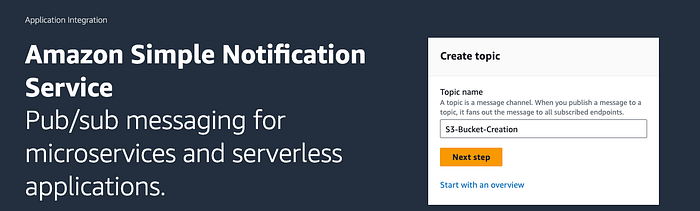
Step 1. Create SNS Topic
In the Details section select Standard & scroll down to Create Topic.
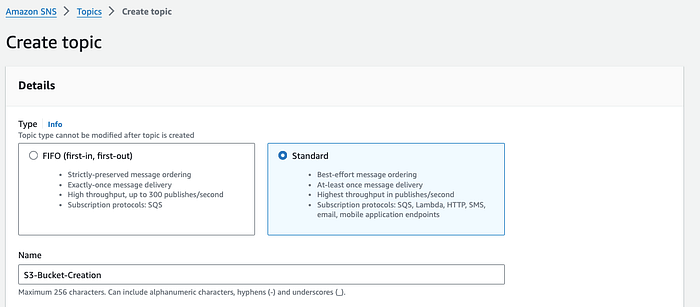
Step 1.1. Name SNS Topic
Next Create a subscription to the topic. Under the Subscriptions tab select Create subscription. For Protocol select Email and enter an email address that can receive notifications.
Check your email inbox and choose Confirm subscription in the email from AWS Notifications. The sender ID is usually “[email protected]”. Click on the Confirm Subscription link in the email.
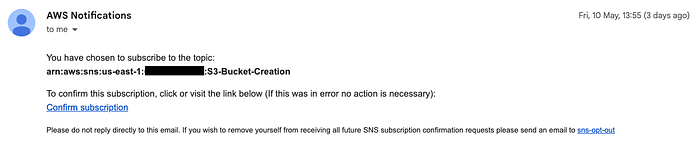
Email confirmation of subscription to SNS topic (AWS account ID obscured)
Configure Slack Client
To allow AWS Chatbot to send notifications or run commands, you must configure AWS Chatbot with Slack.
Open your Slack workspace, on the left navigation pane, choose Automations. If you don’t see Automations choose More, Automations. Browse Apps directory for AWS Chatbot

Step 2. Add AWS Chatbot app to Slack
Configure AWS Chatbot Client
Open the AWS Chatbot console. Under Configure a chat client, choose Slack, then choose Configure. After choosing Configure, you’ll be redirected to Slack’s authorisation page to request permission for AWS Chatbot to access your information
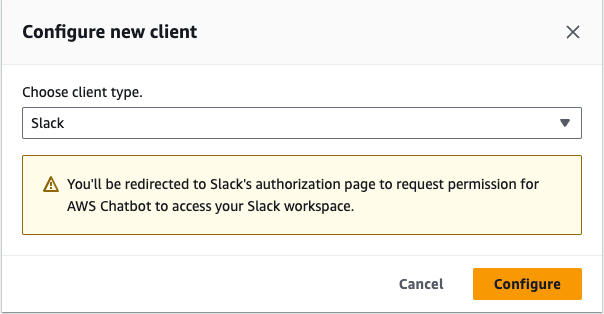
Step2.2 Configure AWS Chatbot Client
From the dropdown list at the top right, choose the Slack workspace that you want to use with AWS Chatbot. For this demonstration I’m using my workspace Ciara-Cloud Slack workspace. Click the Allow button.

Step 2.3 Provide plugin with permissions.
Configure Slack Channel
Configure AWS Chatbot with a Slack channel so it can send you notifications. In your Slack channel, enter invite @aws. Choose Invite Them.

Step 3. Invite AWS Chatbot app to Slack channel
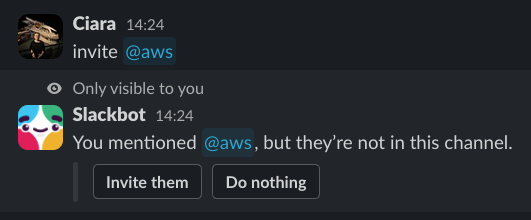
Step 3.1 Click Invite them button to add app
Navigate back to your AWS Chatbot client. Choose Configure new channel.
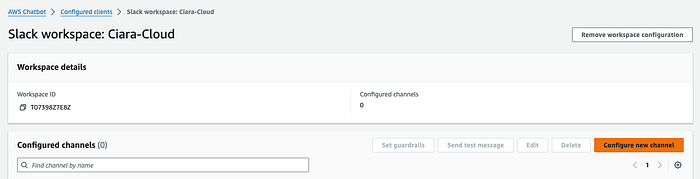
Step 3.2 Configure AWS Chatbot client
Under Configuration details, enter a name for your configuration. From Slack get your channel ID or URL by by right-clicking on the channel name in the left pane and choosing Copy Link.
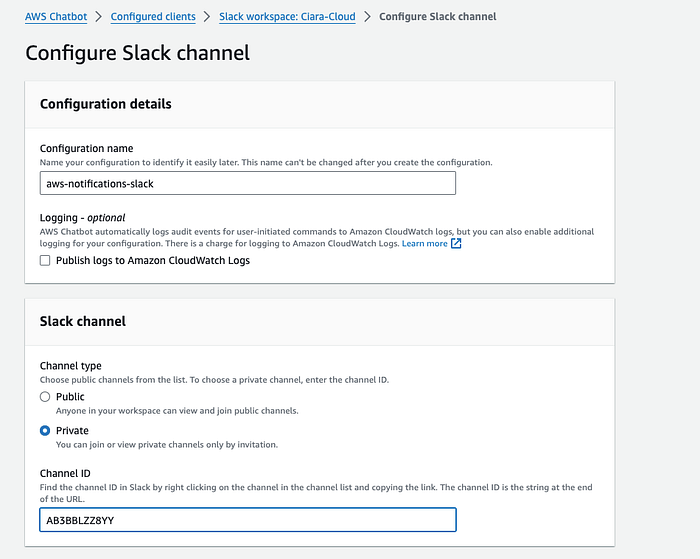
Step 3.3 Configure AWS Chatbot client details
Next define the user permissions. AWS Chatbot requires an IAM role to perform actions. For Role Setting select Channel role which gives all channel members the same permissions.
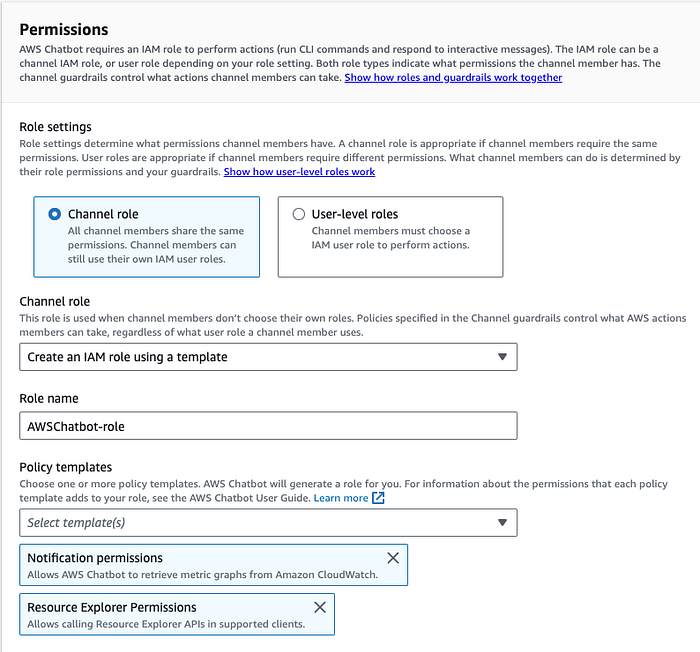
Step 3.4 Define user permissions for AWS Chatbot Client
Scroll down to Notifications, under SNS topics select the AWS Region where you created the SNS topic & select the topic name. Click Configure.
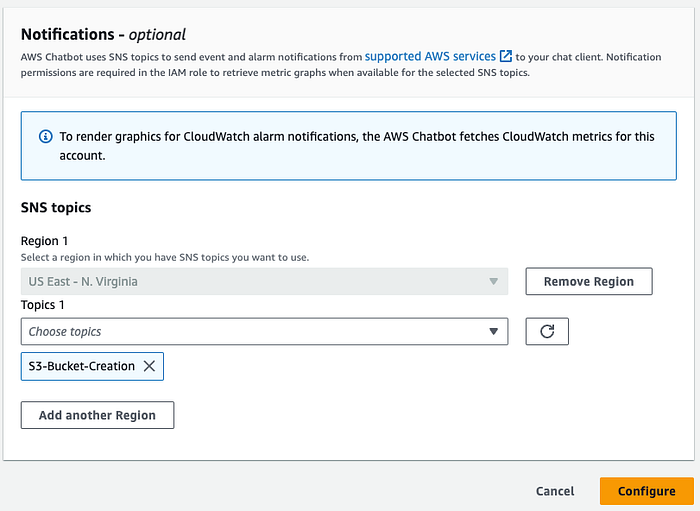
Step 3.5 Select SNS Topic for AWS Chatbot Client
Configure Amazon EventBridge Rule
We will use Amazon EventBridge to trigger the notification which will be sent to the Slack channel as well as on the email subscribed on SNS topic. Open the Amazon EventBridge console, select EventBridge Rule and click Create rule.
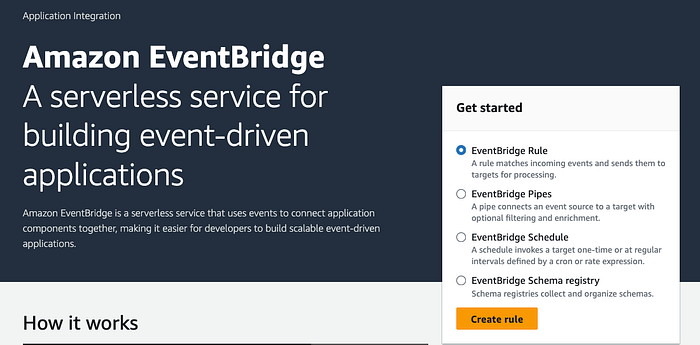
Step 4. Create EventBridge Rule
Enter a name and description for the rule. For Event bus select default and for Rule type select Rule with an event pattern.

Step 4.1 Define EventBridge Rule Details
Under Event source, choose AWS events or EventBridge partner events.
Scroll down to Creation method, choose Use pattern form.
Under Event pattern, use the following:
For Event source, select AWS services from the drop-down list.
For AWS service, select S3 from the drop-down list.
For Event type, choose Bucket-Level API Call via CloudTrail.
Choose Specific events(s) and choose CreateBucket. Click Next.
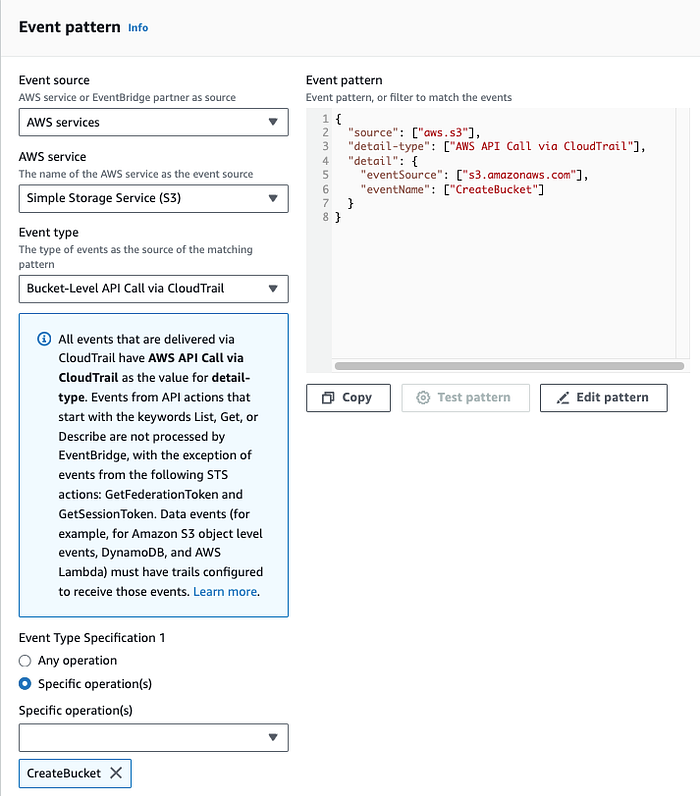
Step 4.3 Define Event Pattern
For Target types select AWS service and choose SNS topic as the target. Under Topic choose the SNS topic created earlier. Click Next and Create rule.
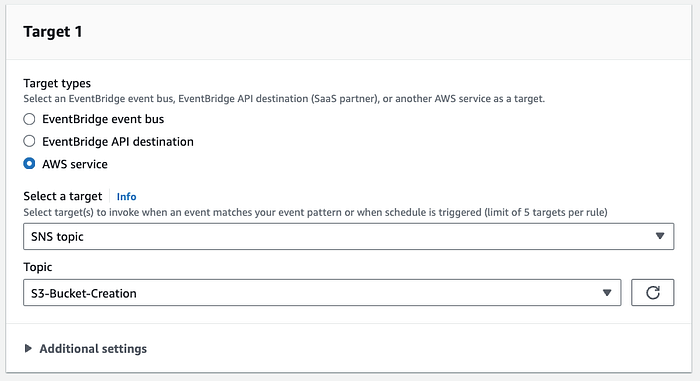
Step 4.4 Define Event Target
We’ve now created the EventBridge rule that will trigger when an S3 bucket is created in the event.

EventBridge Rule Enabled
Test EventBridge rule to send notifications
Open the S3 console and create a new bucket. Then check your Slack channel and email for the notification.

Step 5. Create S3 Bucket to test notification
As soon as the S3 bucket was created Slack notified me in the specified channel.
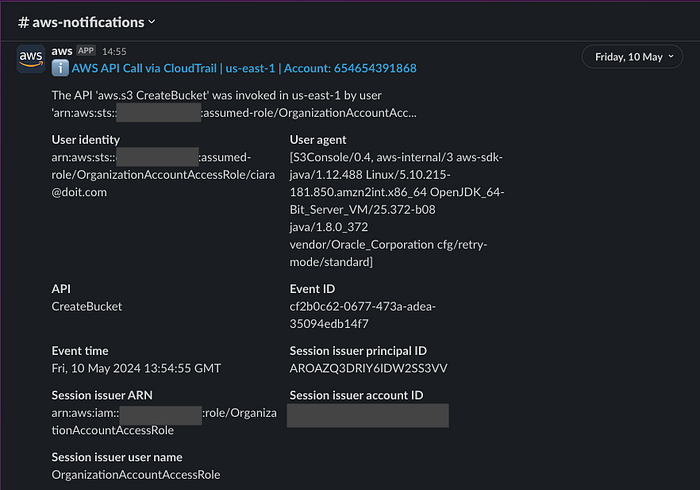
Slack Notification (AWS account ID obscured)
I also received an email notification of the event.
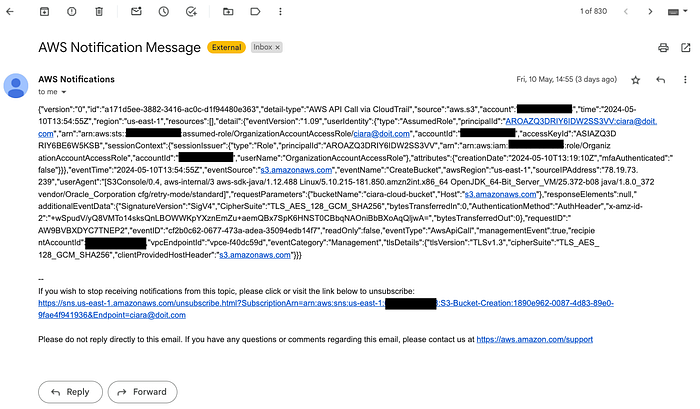
Email Notification (AWS account ID obscured)
In conclusion, we’ve successfully walked through the process of integrating AWS Chatbot with Slack, creating a powerful tool that allows us to receive real-time notifications of AWS events right within our chat channels.
This integration not only streamlines our operations but also enhances our response time to any potential issues, ensuring optimal performance and uptime for our services.
At DoiT Internatioinal, we understand that every organisation has unique needs and challenges. If you need assistance with your AWS accounts or configuring your services, don’t hesitate to reach get in touch.
Our team of experts specialises in Amazon Web Services, Google Cloud, Microsoft Azure, and OpenAI, and we’re ready to help you navigate the complexities of cloud services to achieve your business goals.
Remember, the cloud doesn’t have to be complicated. With the right partner, you can harness its full potential to drive innovation and growth. Contact us today, and let’s start the conversation about how we can support your cloud journey.